iOS如何實(shí)現(xiàn)橫豎屏旋轉(zhuǎn)內(nèi)容-創(chuàng)新互聯(lián)
這篇文章主要介紹了iOS如何實(shí)現(xiàn)橫豎屏旋轉(zhuǎn)內(nèi)容,具有一定借鑒價(jià)值,感興趣的朋友可以參考下,希望大家閱讀完這篇文章之后大有收獲,下面讓小編帶著大家一起了解一下。

一、前言
Swift版本 4.0
Xcode版本 9.2
以前接觸到的項(xiàng)目需求中,幾乎都是全豎屏展現(xiàn)界面,所以我也來(lái)得省事,直接在TARGETS中的界面方向選項(xiàng)中只勾選豎屏,這樣就滿(mǎn)足了需求。
但最近的項(xiàng)目中,產(chǎn)品突然增加了一個(gè)需求,需要部分界面支持旋轉(zhuǎn),這才來(lái)研究了一下屏幕旋轉(zhuǎn)的問(wèn)題!
需要緊急解決問(wèn)題的道友直接看3.3
二、屏幕旋轉(zhuǎn)相關(guān)知識(shí)
2.1 三個(gè)方向的理解和聯(lián)系
UIDeviceOrientation: 設(shè)備方向
public enum UIDeviceOrientation : Int {
 case unknown
 case portrait // 設(shè)備vertically方向, home鍵在下方
 case portraitUpsideDown // 設(shè)備vertically方向, home鍵在上方
 case landscapeLeft // 設(shè)備horizontally方向, home鍵在右方
 case landscapeRight // 設(shè)備horizontally方向, home鍵在左方
 case faceUp // 設(shè)備flat方向, 屏幕朝上
 case faceDown // 設(shè)備flat方向, 屏幕朝下
}
從設(shè)備方向的命名就能看出來(lái)這個(gè)枚舉的含義,這里指的是物理設(shè)備(即iPhone)的方向。
UIInterfaceOrientation: 界面方向
public enum UIInterfaceOrientation : Int {
 case unknown
 case portrait
 case portraitUpsideDown
 case landscapeLeft
 case landscapeRight
}
而界面方向指屏幕中顯示內(nèi)容的方向,它的方向和Home鍵的方向是一致的。仔細(xì)觀(guān)察一下屏幕旋轉(zhuǎn)就能理解UIDeviceOrientation和UIInterfaceOrientation了,我們把手機(jī)轉(zhuǎn)向左邊,可以看到界面隨之才轉(zhuǎn)向右邊。
UIInterfaceOrientationMask: 是用來(lái)控制允許轉(zhuǎn)向的方向,對(duì)應(yīng)UIInterfaceOrientation
public struct UIInterfaceOrientationMask : OptionSet {
 public init(rawValue: UInt)
 public static var portrait: UIInterfaceOrientationMask { get }
 public static var landscapeLeft: UIInterfaceOrientationMask { get }
 public static var landscapeRight: UIInterfaceOrientationMask { get }
 public static var portraitUpsideDown: UIInterfaceOrientationMask { get }
 public static var landscape: UIInterfaceOrientationMask { get }
 public static var all: UIInterfaceOrientationMask { get }
 public static var allButUpsideDown: UIInterfaceOrientationMask { get }
}
2.2 觀(guān)察屏幕旋轉(zhuǎn)并作出響應(yīng)
2.2.1 觀(guān)察設(shè)備方向并響應(yīng)
// 沒(méi)有生成通知
if !UIDevice.current.isGeneratingDeviceOrientationNotifications {
 // 生成通知
  UIDevice.current.beginGeneratingDeviceOrientationNotifications()
}
// 鎖定豎屏,依然有效,例如faceUp.
NotificationCenter.default.addObserver(self,
          selector: #selector(handleDeviceOrientationChange(notification:)),       name:NSNotification.Name.UIDeviceOrientationDidChange,
          object: nil)
@objc private func handleDeviceOrientationChange(notification: Notification) {
// 獲取設(shè)備方向
let orientation = UIDevice.current.orientation
switch orientation {
case .landscapeRight:
// iOS8之后,橫屏UIScreen.main.bounds.width等于豎屏?xí)r的UIScreen.main.bounds.height
print(UIScreen.main.bounds.width)
print("landscapeRight")
default: break
}
}注銷(xiāo)
deinit {
 NotificationCenter.default.removeObserver(self)
 UIDevice.current.endGeneratingDeviceOrientationNotifications()
}
2.2.2 觀(guān)察界面方向并響應(yīng)
和上面類(lèi)似不過(guò)觀(guān)察的name為
// 鎖定豎屏,無(wú)效,通知方法不會(huì)觸發(fā)
NSNotification.Name.UIApplicationWillChangeStatusBarOrientation
NSNotification.Name.UIApplicationDidChangeStatusBarOrientation
獲取界面方向
let statusBarOrientation = UIApplication.shared.statusBarOrientation
2.2.3 建議
這里建議監(jiān)聽(tīng)界面方向,原因有二:
監(jiān)聽(tīng)設(shè)備方向,會(huì)返回多個(gè)方向,例如portrait和faceUp不沖突。
監(jiān)聽(tīng)設(shè)備方向,上面提到,先是設(shè)備旋轉(zhuǎn),隨之界面旋轉(zhuǎn),這里就有一個(gè)問(wèn)題,我們操作界面時(shí),可能界面還沒(méi)有旋轉(zhuǎn)。
三、問(wèn)題解決實(shí)戰(zhàn)
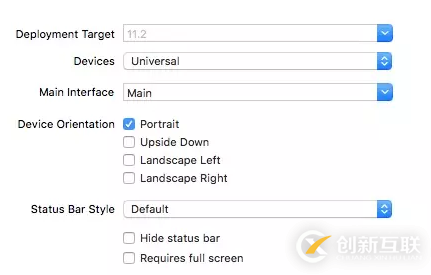
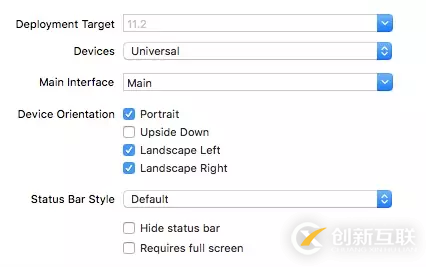
需要實(shí)現(xiàn)部分界面可旋轉(zhuǎn),部分界面鎖定豎屏,首先我們需要配置TARGETS中的Device Orientation,這里是總開(kāi)關(guān),默認(rèn)勾選了如圖方向:
如果你確定整個(gè)項(xiàng)目只有豎屏,直接只勾選Protrait完事,不過(guò)像我現(xiàn)在這樣,可能突然一個(gè)需求改變就不得不繼續(xù)適配,哈哈。
這里的配置不要和代碼控制的方向相沖突,不然會(huì)引發(fā)奔潰。
3.1 控制屏幕旋轉(zhuǎn)的函數(shù)
// 默認(rèn)為true
override var shouldAutorotate: Bool {
 return true
}
// 支持的旋轉(zhuǎn)方向
override var supportedInterfaceOrientations: UIInterfaceOrientationMask {
 return .landscapeLeft
}
// 模態(tài)切換的默認(rèn)方向
override var preferredInterfaceOrientationForPresentation: UIInterfaceOrientation {
 return .landscapeRight
}
這三個(gè)屬性都重寫(xiě)的UIViewController的屬性。哎,看到模態(tài)切換,這里再給自己挖坑一個(gè),以前研究了一會(huì)模態(tài)切換,只不過(guò)沒(méi)寫(xiě)成總結(jié),后面會(huì)寫(xiě)出來(lái)(:。
并且這三個(gè)方法會(huì)受到控制器層級(jí)的影響,也就是如果當(dāng)前控制器配置支持旋轉(zhuǎn),如果他的導(dǎo)航控制器,乃至Tabbar控制器不支持旋轉(zhuǎn),當(dāng)前控制器的配置也不會(huì)生效。
3.2 不同根控制器情況下的解決
核心問(wèn)題: 需要旋轉(zhuǎn)的界面是少數(shù),大多界面需要鎖定豎屏。
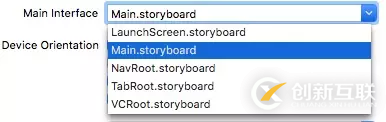
3.2.1 根控制器為UIViewController
對(duì)應(yīng)Demo配置:
這種情況的APP可以說(shuō)是非常少了,不過(guò)還是對(duì)后面的情況有所幫助。
設(shè)置BaseVC,在其中的配置鎖定豎屏:
class BaseVC: UIViewController {
 override var shouldAutorotate: Bool {
  return false
 }
 override var supportedInterfaceOrientations: UIInterfaceOrientationMask {
  return .portrait
 }
 override var preferredInterfaceOrientationForPresentation: UIInterfaceOrientation {
  return .portrait
 }
 override func viewDidLoad() {
  super.viewDidLoad()
 }
}
然后其余控制器繼承BaseVC,需要旋轉(zhuǎn)的控制器單獨(dú)再次重寫(xiě)方法。
3.2.2 根控制器為UINavigationController
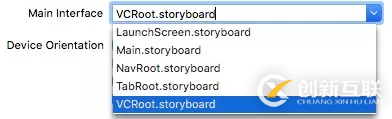
對(duì)應(yīng)Demo配置:
我們可以獲取到當(dāng)前顯示層級(jí)的控制器,并拿出它的屬性賦給UINavigationController
class BaseNavC: UINavigationController {
override var shouldAutorotate: Bool {
return self.viewControllers.last?.shouldAutorotate ?? false
}
override var supportedInterfaceOrientations: UIInterfaceOrientationMask {
return self.viewControllers.last?.supportedInterfaceOrientations ?? .portrait
}
override var preferredInterfaceOrientationForPresentation: UIInterfaceOrientation {
return self.viewControllers.last?.preferredInterfaceOrientationForPresentation ?? .portrait
}
override func viewDidLoad() {
super.viewDidLoad()
}
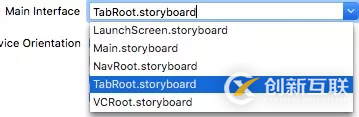
}3.2.3 根控制器為UITabBarController
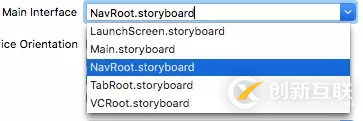
對(duì)應(yīng)Demo配置:
class BaseTabBarC: UITabBarController {
 override var shouldAutorotate: Bool {
  return self.selectedViewController?.shouldAutorotate ?? false
 }

 override var supportedInterfaceOrientations: UIInterfaceOrientationMask {
  return self.selectedViewController?.supportedInterfaceOrientations ?? .portrait
 }

 override var preferredInterfaceOrientationForPresentation: UIInterfaceOrientation {
  return self.selectedViewController?.preferredInterfaceOrientationForPresentation ?? .portrait
 }

 override func viewDidLoad() {
  super.viewDidLoad()
 }
}
同理,我們只需要獲取當(dāng)前選中的控制器的配置賦給UITabBarController,這樣一層一層就配置好了!
3.3 最簡(jiǎn)單的實(shí)現(xiàn)方式
對(duì)應(yīng)Demo配置:
在查詢(xún)屏幕旋轉(zhuǎn)相關(guān)資料的時(shí)候我發(fā)現(xiàn)屏幕旋轉(zhuǎn)時(shí)會(huì)最后調(diào)用Appdelegate中的:
func application(_ application: UIApplication, supportedInterfaceOrientationsFor window: UIWindow?)
-> UIInterfaceOrientationMask {
}
然后我立馬想到一個(gè)超級(jí)簡(jiǎn)單的方法,那就是定義一個(gè)全局變量或者緩存一個(gè)bool值來(lái)進(jìn)行判斷,如下:
func application(_ application: UIApplication, supportedInterfaceOrientationsFor window: UIWindow?)
-> UIInterfaceOrientationMask {
 if isAllowAutorotate {
  return [.portrait, .landscapeLeft, .landscapeRight]
 }
 else {
  return .portrait
 }
}
然后默認(rèn)isAllowAutorotate這個(gè)全局變量為false,在需要旋轉(zhuǎn)的控制器中:
override func viewWillAppear(_ animated: Bool) {
  super.viewWillAppear(animated)
  isAllowAutorotate = false
 }

 override func viewWillDisappear(_ animated: Bool) {
  super.viewWillDisappear(animated)
  isAllowAutorotate = true
 }
}
這樣就不用麻煩的去搞那些繼承什么的了!
感謝你能夠認(rèn)真閱讀完這篇文章,希望小編分享的“iOS如何實(shí)現(xiàn)橫豎屏旋轉(zhuǎn)內(nèi)容”這篇文章對(duì)大家有幫助,同時(shí)也希望大家多多支持創(chuàng)新互聯(lián)建站,關(guān)注創(chuàng)新互聯(lián)網(wǎng)站建設(shè)公司行業(yè)資訊頻道,更多相關(guān)知識(shí)等著你來(lái)學(xué)習(xí)!
另外有需要云服務(wù)器可以了解下創(chuàng)新互聯(lián)建站chinadenli.net,海內(nèi)外云服務(wù)器15元起步,三天無(wú)理由+7*72小時(shí)售后在線(xiàn),公司持有idc許可證,提供“云服務(wù)器、裸金屬服務(wù)器、高防服務(wù)器、香港服務(wù)器、美國(guó)服務(wù)器、虛擬主機(jī)、免備案服務(wù)器”等云主機(jī)租用服務(wù)以及企業(yè)上云的綜合解決方案,具有“安全穩(wěn)定、簡(jiǎn)單易用、服務(wù)可用性高、性?xún)r(jià)比高”等特點(diǎn)與優(yōu)勢(shì),專(zhuān)為企業(yè)上云打造定制,能夠滿(mǎn)足用戶(hù)豐富、多元化的應(yīng)用場(chǎng)景需求。
分享文章:iOS如何實(shí)現(xiàn)橫豎屏旋轉(zhuǎn)內(nèi)容-創(chuàng)新互聯(lián)
分享URL:http://chinadenli.net/article44/dgpiee.html
成都網(wǎng)站建設(shè)公司_創(chuàng)新互聯(lián),為您提供軟件開(kāi)發(fā)、網(wǎng)站設(shè)計(jì)公司、定制開(kāi)發(fā)、做網(wǎng)站、ChatGPT、自適應(yīng)網(wǎng)站
聲明:本網(wǎng)站發(fā)布的內(nèi)容(圖片、視頻和文字)以用戶(hù)投稿、用戶(hù)轉(zhuǎn)載內(nèi)容為主,如果涉及侵權(quán)請(qǐng)盡快告知,我們將會(huì)在第一時(shí)間刪除。文章觀(guān)點(diǎn)不代表本網(wǎng)站立場(chǎng),如需處理請(qǐng)聯(lián)系客服。電話(huà):028-86922220;郵箱:631063699@qq.com。內(nèi)容未經(jīng)允許不得轉(zhuǎn)載,或轉(zhuǎn)載時(shí)需注明來(lái)源: 創(chuàng)新互聯(lián)
猜你還喜歡下面的內(nèi)容
- Vue前端實(shí)現(xiàn)登陸攔截及axios攔截器的使用-創(chuàng)新互聯(lián)
- 使用JavaScript怎么讀寫(xiě)二進(jìn)制數(shù)據(jù)-創(chuàng)新互聯(lián)
- 多個(gè)角度分析滲透測(cè)試網(wǎng)站安全性能-創(chuàng)新互聯(lián)
- python中判斷文件結(jié)束符的方法-創(chuàng)新互聯(lián)
- 重載逗號(hào)操作符-創(chuàng)新互聯(lián)
- Android中如何實(shí)現(xiàn)一個(gè)菜單系統(tǒng)-創(chuàng)新互聯(lián)
- RedHat6.6之安裝oracle11gR2教程-創(chuàng)新互聯(lián)

- 企業(yè)網(wǎng)站制作的注意事項(xiàng) 2017-12-12
- 企業(yè)網(wǎng)站制作做成怎樣才有特色 2014-01-28
- 企業(yè)網(wǎng)站制作怎么才能吸引用戶(hù)瀏覽? 2023-04-20
- 企業(yè)網(wǎng)站制作到底有什么作用 2021-08-31
- 中小企業(yè)網(wǎng)站制作,網(wǎng)站SEO要如何獲得更多百度流量和排名? 2021-12-15
- 國(guó)內(nèi)企業(yè)網(wǎng)站制作存在的一些問(wèn)題 2016-10-06
- 企業(yè)網(wǎng)站制作未來(lái)的發(fā)展趨勢(shì) 2021-11-10
- 企業(yè)網(wǎng)站制作做了是給誰(shuí)看的呢? 2023-03-15
- 包頭企業(yè)網(wǎng)站制作:你知道如何做網(wǎng)站建設(shè)方案嗎? 2021-09-30
- 企業(yè)網(wǎng)站制作推廣中的看價(jià)格失誤 2013-11-22
- 塑膠模型外貿(mào)企業(yè)網(wǎng)站制作:如何提升網(wǎng)站流量? 2015-05-03
- 企業(yè)網(wǎng)站制作好后維護(hù)管理的重要性 2023-04-22